Hey there, gamer enthusiasts and tech tinkerers! Welcome to your one-stop shop for all things related to hitbox customization. Whether you’re a seasoned pro or just starting to dabble in the world of controller modification, this guide will take you through the ins and outs of setting up your own custom hitbox. Relax, grab a snack, and let’s get creative with our gaming setups!
Read Now : Personalized Puzzle Game Software
Understanding Your Hitbox Needs
Before diving headlong into the ocean of customization, it’s crucial to understand why you might want a custom hitbox setup in the first place. Hitboxes are all about precision, allowing you to execute moves with pinpoint accuracy that traditional controllers might struggle to offer. A custom hitbox setup guide helps you tailor this innovative gaming tool to your unique style, making your gameplay not only more effective but also more enjoyable.
Imagine being able to map out every button to perfectly fit your hand placement and play style. A custom setup offers that functionality. Plus, it’s just plain fun to create something uniquely yours! The increased control can make a significant difference, especially in competitive scenarios where even the smallest advantage counts. With a little patience and creativity, a custom hitbox can change the way you play and experience your favorite games.
Gathering Your Materials
To get started on your custom hitbox setup journey, you’ll need a few essential items. First on the list are switches and buttons that match your personal aesthetic and functional requirements. Choose components that offer the right tactile feedback you’re looking for. Plus, you’ll need a controller board that supports custom mappings to allow everything to work smoothly.
Designing Your Layout
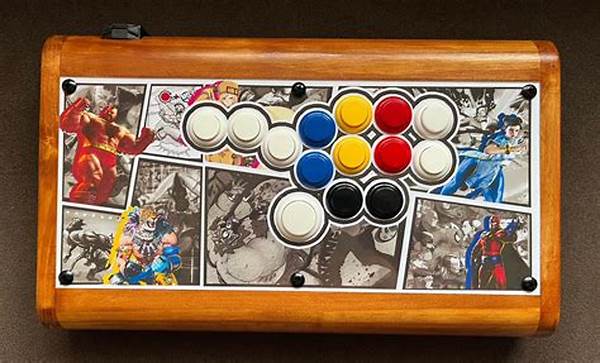
The layout is a crucial aspect of any custom hitbox setup guide. Planning where each button will go is like being the architect of your own gaming destiny. Do you want a classic arcade style, or perhaps something entirely new? Decide which hand will hold what responsibility in combat. Mark it out on paper before you start drilling holes and making irreversible changes.
Assembling the Hitbox
Once your planning is done and your materials are gathered, it’s time to assemble! Think of this step like putting together a jigsaw puzzle, except this time, the pieces are wires and buttons. Follow your custom hitbox setup guide carefully to ensure all connections are secure. An organized workspace and a methodical approach will be your best friends here.
Testing and Tuning
With everything in place, the next step is testing. Plug your hitbox into your console or PC and boot up a game to see how it feels. This phase is vital for identifying areas that need fine-tuning. Adjust button sensitivity and swapping out components can make all the difference. The beauty of a custom hitbox is in these refined tweaks that make your device feel just right.
Read Now : “game Piece Movement Automation”
Advanced Customization Options
If you’re eager to push boundaries beyond basic modifications, there’s a whole world of advanced options to explore. Consider integrating LED lights for that extra flair or experimenting with materials like acrylic and metal for a more robust build. Understand software tweaks as well—certain games may allow for more intricate control setups. Let your custom hitbox setup guide be a canvas for your creativity.
Maintenance Tips for Your Custom Hitbox
Care and maintenance are key to ensuring your hitbox runs smoothly for years to come. Every so often, open up your device to dust it out. Keeping the inner workings clean can prevent accidental malfunctions. Regularly check the status of the switches and buttons for any wear and tear that might affect their performance. Your custom hitbox is like a fine instrument, the better you care for it, the longer it’ll stay in tune.
Wrapping It All Up
Well, there you have it! A full-fledged custom hitbox setup guide that’s more about creativity and innovation than merely instructions. By now, you have a firm grasp on what it takes to design and assemble your signature gaming companion. Whether it’s diving into competitive play or just having fun, remember that the most rewarding part of this journey is personalizing your tools in ways traditional controllers can’t offer. Now, go ahead and show off your masterpiece!