Hey there, game design enthusiasts! If you’ve ever dabbled in creating your own games, chances are you’ve come across Construct 3, a fantastic game development platform that’s perfect for both beginners and seasoned designers. One of the most engrossing components of game design is constructing levels, where your creativity can truly thrive. In this article, we’re diving headfirst into the art of designing levels in Construct 3. Let’s embark on this digital journey together, shall we?
Read Now : Game Development Tools For Starters
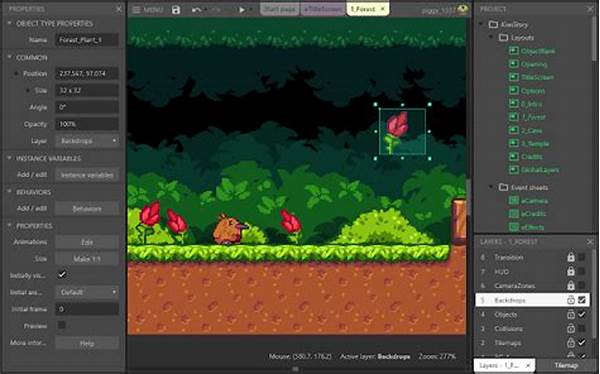
The Basics of Designing Levels in Construct 3
When you start designing levels in Construct 3, there’s no need to feel overwhelmed. This platform is incredibly user-friendly, making it a breeze to navigate even if you’re new to game design. Begin by familiarizing yourself with the interface, where you’ll find tools that allow you to create objects, set up behaviors, and test your settings on-the-go. One great tip is to sketch your ideas on paper before bringing them to life digitally. By mapping out the layout, challenges, and visual themes, you lay the groundwork for a well-balanced and engaging level. The objective is to ensure that your players have fun while also challenging their skills, a hallmark of any successful game level.
By focusing on a specific theme or story, you can create cohesive and immersive experiences for your players. As you get the hang of it, play around with adding layers of complexity to your levels. Maybe introduce puzzles, hidden paths, or even mini-challenges that captivate the player. Testing is key, so be sure to play through your level multiple times to catch any potential hitches or areas for improvement. Remember, designing levels in Construct 3 is all about trial, error, and, most importantly, having fun while you create!
Tips for Designing Levels in Construct 3
1. Start Simple: Great design often begins with simplicity. Designing levels in Construct 3 is no different. Begin with basic layouts, then add complexity as you improve.
2. Get Creative with Themes: Thematic consistency is essential. By sticking to a compelling theme, you keep players invested in your game.
3. Iterative Testing: Test, tweak, and re-test. This cycle is crucial in designing levels in Construct 3 to ensure smooth gameplay and fun.
4. Player Feedback: Listen to others’ experiences. Feedback can offer insights that you might not have considered while designing levels in Construct 3.
5. Experiment with Mechanics: Don’t fear experimentation. Creative mechanics can differentiate a good level from a great one, adding depth to your design in Construct 3.
Advanced Techniques in Designing Levels in Construct 3
Once you’ve got the hang of the basics, it’s time to dive deeper into advanced techniques. If you’re looking to create complex gameplay experiences, harness the power of variables and events in Construct 3. These elements are the backbone of interactivity, allowing you to manipulate objects, change level dynamics, and create unpredictable scenarios. Think about how altering player perspectives through innovative mechanics can enhance the storyline.
Incorporating sound design is another way to elevate your levels dramatically. With Construct 3’s sound capabilities, you can create an atmospheric ambiance that enhances the immersive experience. The sound of footsteps, ambient game music, or even a simple warning beep can enrich the player’s engagement with your level. It’s about crafting a fully immersive experience where visuals, mechanics, and sounds all contribute to a unified gameplay narrative.
Common Challenges in Designing Levels in Construct 3
1. Balancing Difficulty: Finding that sweet spot between too easy and frustratingly hard is vital.
2. Performance Optimization: Overloading your level can slow down gameplay, so optimize for smoother performance.
3. Visual Cohesion: Maintaining a consistent visual style throughout your level is essential for immersion.
4. Creative Block: It’s normal. Break the block with brainstorming or take a break to reignite creativity.
5. Overcomplexity: Sometimes simple designs work best; don’t overcomplicate for the sake of it.
Read Now : Protecting Game Assets And Copyrights
6. Feedback Adaptation: Adjusting designs based on feedback can be tricky but essential.
7. Time Management: Stay organized to ensure the project doesn’t become overwhelming.
8. Market Awareness: Be aware of existing games to innovate rather than imitate.
9. Technical Bugs: These can crop up; patience and troubleshooting are part of the process.
10. Player Engagement: Keeping players hooked throughout is a constant challenge but key to a level’s success.
Organizing Your Workflow in Designing Levels in Construct 3
We know that creativity can sometimes lead to chaos — files all over the place, a tangled web of ideas, you name it! To design levels in Construct 3 efficiently, organization is your best friend. Start by using folders and labels within Construct 3 to keep track of different assets, scripts, and drafts. Trust me, a well-organized project means less time searching for that one sprite and more time creating. Another pro tip: draft a level design document outlining the flow and the unique elements for each level.
Having a documentation process aids in maintaining clarity and accomplishing goals efficiently. Adopt a habit of setting mini deadlines and objectives to break down the daunting task of level creation into manageable bits. Remember to incorporate frequent playtesting sessions within your workflow, ensuring that you spot design flaws and rectify them immediately. Lastly, don’t underestimate the power of community forums and resources. Engage, learn, and seek inspiration from fellow designers who can offer invaluable insights and feedback on your work.
Enhancing Player Experience When Designing Levels in Construct 3
Finally, let’s talk about enhancing the player’s experience while designing levels in Construct 3. Player experience is everything, right? Focus on embedding simple but effective tutorials or hints within your level, helping players grasp new mechanics quickly without feeling overwhelmed. Use visual cues like contrasting colors or blinking lights to guide them effortlessly through objectives. Another vital aspect is to sprinkle surprises throughout your level, like a hidden treasure or an unexpected challenge — these can provide a satisfying adrenaline rush and keep players hooked.
Always aim for balanced pacing. Weave periods of tension with moments of relief, letting the player catch their breath yet stay engaged. Implement checkpoints to maintain progress and reduce frustration, allowing players to retry without losing their momentum entirely. Every aspect of your level should work in tandem to form a cohesive and immersive experience that delights players and leaves them craving more. Remember, the ultimate goal in designing levels in Construct 3 is to craft an exciting, engaging, and memorable adventure for your players.
Wrapping Up: Designing Levels in Construct 3
In conclusion, designing levels in Construct 3 is a delightful mix of art and technical skill. Whether you’re just starting or an experienced designer looking to refine your work, this platform offers tools and flexibility to manifest your creative dreams. The key is to be patient, iterative, and open to feedback. Design isn’t a solitary activity; it’s an evolving process enriched by collaboration and diverse perspectives.
Keep experimenting with new ideas, embrace failures as learning opportunities, and, most importantly, have fun with it! Remember, every level you create is a piece of a larger world that players will explore, so take pride in your creation. Whether players are breezing through or pausing to admire your design, your levels in Construct 3 have the potential to make a lasting impact. Now go ahead and let your imagination run wild in the world of game design!