Hey there! So, you’ve decided to dive into the world of Construct 3, huh? Fantastic choice! It’s a great tool for game development, but like anything new, it can sometimes feel a bit like a maze. Luckily, mastering the layout view isn’t as tricky as it seems at first. Let’s journey together to navigate Construct 3’s layout view and make your game development process a breeze.
Read Now : Game Builder Apps For Mobile Game Development
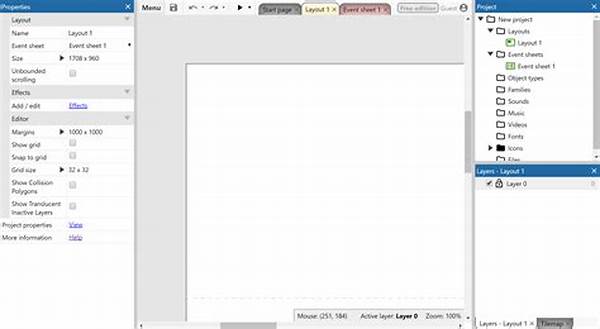
Setting the Ground: Understanding the Basics
When you’re navigating Construct 3 layout view, think of it as the canvas where all your creativity unfolds. It’s your playground, where you get to lay out every element of your game. But don’t worry, navigating this view is not all work and no play. Trust me, once you get the hang of the layout view, it becomes an exciting area brimming with potential. Start by familiarizing yourself with the panels and tools. These are your quintessential guides navigating through this creative terrain. Take note of the properties bar, as it’s your go-to for altering and customizing your game elements. The timeline panel, on the other hand, is your best friend when dealing with animations. Once you recognize the powerups each interface offers, navigating Construct 3 layout view becomes second nature. Next thing you know, you’ll be breezing through sprite placements, aligning objects with pixel precision, and basically choreographing an exciting world for your game’s players.
Exploring the Layout Settings
1. Zooming In and Out: Navigating Construct 3 layout view without utilizing the zoom feature is like playing a game with one eye closed. Be sure to zoom in to make pixel-perfect adjustments.
2. Grids and Guides: Activate the grid to simplify positioning. When navigating Construct 3 layout view, grids and guides help keep everything orderly.
3. Layering Efforts: Layers can help separate various scenes or UI elements. Navigating Construct 3 layout view efficiently involves organizing each layer wisely.
4. Object Snapping: Do you love symmetry as much as I do? Navigating Construct 3 layout view is easier when objects snap into place.
5. Event Sheets Association: While not directly in the layout, associating relevant event sheets when navigating Construct 3 layout view is crucial for functionality.
Mastering the Tools
Diving deeper into navigating Construct 3 layout view, you’ll want to get cozy with those nifty tools along the toolbar. The select tool? Oh, that’s basically your walking stick navigating this terrain. It lets you grab, move, edit, or delete anything you’ve placed on your canvas. And the paint tool, let’s just say it’s faster than wielding a paintbrush—vivid and precise in its strokes across your layout. As for the tilemap bar, imagine it as Minecraft meets your game layout. It crafts intricate designs with tiles for those elaborate scenes. However, the more you explore, the more you’ll realize how integral each pixel and position is to the overall layout. And remember, features like snap-to-grid can be lifesavers, especially when your game world starts sprawling out.
Navigating Like a Pro
1. Multitasking with Ease: With shortcut keys, navigating Construct 3 layout view helps you switch tools without breaking the flow.
2. Testing Regularly: Continuously preview your layout. It’s the only way navigating Construct 3 layout view can progress effectively.
3. Using Templates: Look for pre-made layouts as a starting point. Navigating Construct 3 layout view becomes smoother with templates.
4. Customizing Shortcuts: Tailor your shortcuts for efficiency. Navigating Construct 3 layout view is quicker when shortcuts reflect your workflow.
Read Now : Mesh Refinement In Engineering Simulations
5. Efficient Asset Management: Organize assets in folders. Navigating Construct 3 layout view with a tidy resource can save loads of time.
6. Collaboration Features: Enable sharing for team projects. Navigating Construct 3 layout view in teams magnifies creativity.
7. Undo/Redo Wisdom: Master these commands to save time. Navigating Construct 3 layout view is forgiving with these enhancements.
8. Utilizing Comments: Leave notes while you work. As you’re navigating Construct 3 layout view, it’ll help when revisiting projects.
9. Cloning Objects: Learn to clone efficiently. Navigating Construct 3 layout view becomes less tedious when you replicate assets.
10. Exploring Tutorials: Check out tutorials. Sometimes, navigating Construct 3 layout view with an expert’s guidance can clarify tricky tools.
Tips and Tricks
Navigating Construct 3 layout view with flair is all about embracing those quirky tips and tricks that the pros use. Whether it’s locking layers to avoid accidental tweaks or using the snap-to-grid feature, these little hacks make a big difference. Diving into the world of behaviors can give your objects a life of their own, making your game dynamic. Plus, don’t forget about the power of plugins—sometimes, the community’s creations can be your secret weapon in crafting a unique game. But hey, learning is a continuous journey! Keep an eye on updates because Construct 3’s developers are always crafting new features to streamline your experience. Besides, you never know when a new tool might take your layout from cool to legendary.
Wrapping It Up
Alright, folks, we’ve navigated a pretty sizable chunk of the Construct 3 layout view together. And here’s the thing: like any journey, navigating Construct 3 layout view improves the more you explore and experiment. Don’t rush; give yourself the time to become friends with each feature. Remember, this isn’t about mastering it all in a day; it’s about enjoying the process of creating, discovering, and sometimes stumbling along the way. Using Construct 3 layout view is about letting your imagination break old boundaries while seamlessly translating that creativity into a grand game adventure. Consider this your passport to creating worlds where possibilities are limitless and every tool turns your visions into reality. Keep exploring, keep creating—and most importantly, have fun gaming!