Hey there, fellow RPG enthusiasts! Welcome to this simple and friendly guide on customizing your RPG Maker assets. Whether you’re new to game development or just looking to add a personal touch to your creations, this guide is here to help you dive into the world of asset customization. So, grab your favorite beverage, relax, and let’s unlock the limitless possibilities of your imagination with our RPG Maker Asset Customization Guide!
Read Now : Beginner-friendly Design Programs
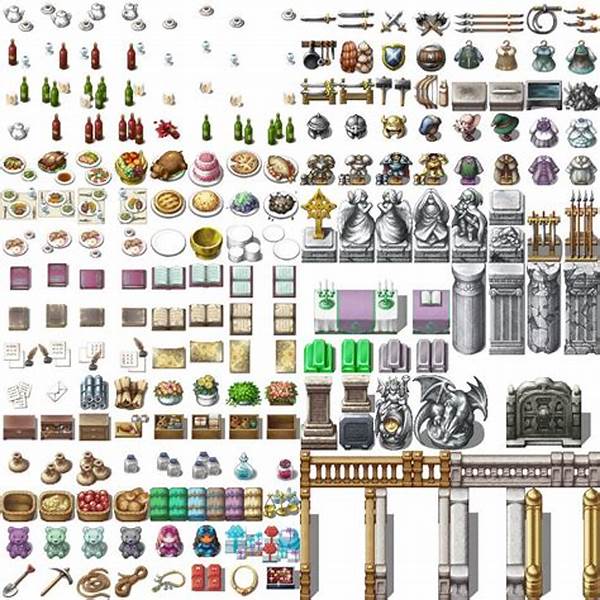
Understanding the Basics of RPG Maker Asset Customization
Customizing assets in RPG Maker can empower you to create unique, personal experiences through your games. The RPG Maker Asset Customization Guide is the perfect starting point for anyone eager to dive into the creative side of game development. With this guide, you’ll learn about the foundational elements that make asset customization so special. From character sprites to landscape tiles, you have the ability to tweak, modify, and completely reinvent the components that breathe life into your game.
It’s easy to feel overwhelmed at first, but don’t worry, everyone starts somewhere. The key is starting small and giving yourself room to experiment. Whether it’s altering color palettes, adjusting proportions, or crafting entirely new designs, each customization is a step towards mastering your craft. By the end of this guide, you’ll have the confidence and know-how to tailor your assets to reflect your unique artistic vision. As you explore the depths of the RPG Maker universe, keep in mind that your creativity is the most powerful tool you have in your developer toolbox. Let’s make something amazing together!
Essential Tools for RPG Maker Asset Customization
1. Graphic Editors: Tools like Photoshop or GIMP are essential in our RPG Maker Asset Customization Guide. They allow you to alter images to your liking, letting you refine every detail of your characters and environments.
2. Tileset Modifying Software: Programs such as Tiled Map Editor enable you to tweak and arrange tilesets, ensuring your game’s world is exactly how you envisioned.
3. Sound Editing Software: Customizing sound assets can set the mood. Audacity is a fantastic tool for modifying sound effects and background music to fit your game’s atmosphere.
4. RPG Maker Plugin Community: Tap into community plugins that enhance the RPG Maker’s functionality. They can provide additional customization options you may not have considered.
5. Animation Suites: Tools like Aseprite help you create and modify animations, giving life to the sprites within your game. An animated asset can elevate gaming experiences significantly.
Tips for a Successful RPG Maker Asset Customization
When diving into the RPG Maker Asset Customization Guide, remember that patience is your best friend. Successful customization often involves trial and error, so don’t stress about getting things perfect on the first try. Another pro tip is to join online communities or forums. Engaging with other RPG Maker users can provide inspiration and maybe even a little guidance on tricky topics.
Don’t shy away from experimenting with bold designs and unusual color palettes. Customization is all about expressing your game’s unique identity, so think outside the box! Document your process by keeping backups of your original files. This allows you to revert changes if something doesn’t go as planned. Lastly, take regular breaks to ensure you approach your creations with a fresh perspective, avoiding creative burnout.
Exploring Advanced Techniques in RPG Maker Asset Customization
1. Layer Management: Mastering layers in graphic editors can transform how you create and customize your assets. It allows you to make precise alterations without disrupting other aspects of your design in the RPG Maker Asset Customization Guide.
2. Palette Swapping: Experiment with different color schemes. Minute adjustments in hues can create entirely new atmospheres and character dynamics in your game.
3. Parallax Mapping: This involves creating backgrounds with layered images, allowing for depth and movement within your game’s scenery.
4. Character Sprites Optimization: Learn the intricacies of sprite sheet management to ensure your characters are animated smoothly.
Read Now : Gpu-accelerated Simulation Programs
5. Script Customization: Dive into script modification for added functionality. Tailor every aspect of game mechanics to reflect your project’s unique vision.
6. Bitmap Editing: Modify tiles and textures beyond the basic by breaking them down into editable bitmaps for a more detailed customization process.
7. Lighting Effects: Adjusting lights, shadows, and highlights can add depth to your game world, making environments more immersive.
8. Sound Mixing: Blend multiple audio tracks to create unique soundscapes that complement your visual assets.
9. Custom Overlays: Adding overlays can give your game a distinctive visual flair, enhancing the overall player experience.
10. Importing External Assets: Expand your asset pool by integrating elements from other sources, ensuring compatibility through editing and format conversion.
Crafting Your Unique RPG Experience
Stepping into the world of RPG Maker asset customization is like opening a doorway to infinite possibilities. This RPG Maker Asset Customization Guide is here to encourage and guide you through the process of crafting a truly unique RPG experience. With each asset tailored to fit the essence of your game’s narrative, you will create a world that resonates with authenticity.
Start by envisioning the story you want to tell—whether it’s a grand adventure or a heartfelt tale—and then reflect that vision through your customized assets. Every sprite, tile, and sound element should serve the narrative you’re eager to express. Remember, the key to crafting an unforgettable RPG lies within the small details that come together to form something greater. Don’t be afraid to put your unique spin on popular themes, and embrace your creative liberties.
Final Thoughts on RPG Maker Asset Customization Guide
Approach this endeavor with patience and be open to learning through exploration. Customizing assets may present challenges, but it also offers unparalleled creative fulfillment. By following the RPG Maker Asset Customization Guide, you equip yourself with the skills necessary not only to create a fantastic game but also to bridge your imagination with reality. As you set forth on this journey, embrace each lesson learned as a stepping stone.
Your game becomes more than just a digital experience; it’s a manifestation of your creativity, effort, and passion. Above all, enjoy the process! Game development is about experimenting and having fun, so ensure you savor every step. We hope this guide provides you with the guidance and inspiration to step boldly into your next RPG Maker project. Let your imagination run wild, and remember—each customization brings you closer to your masterpiece.